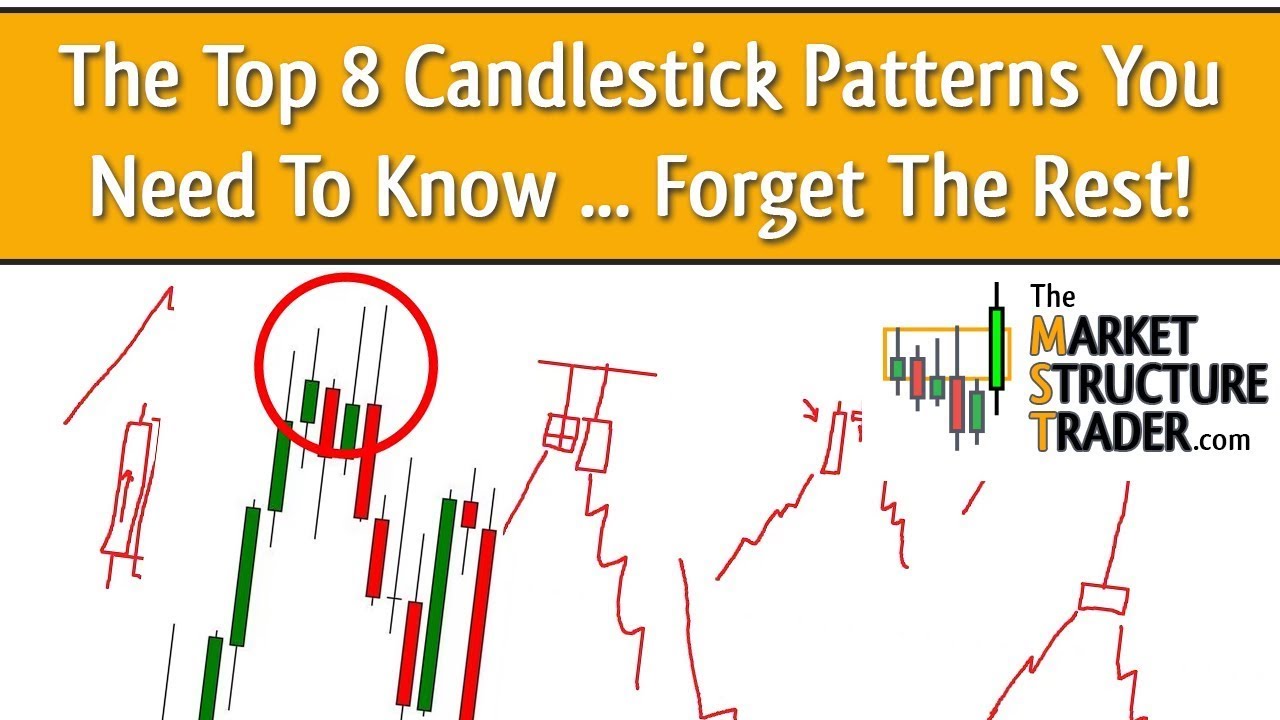
Candlestick patterns are very powerful when used correctly, they show when weakness is starting after a push and tell you when it’s right to take a trade. Forget the rest and concentrate on these top patterns, and you’ll start timing your trades perfectly and get much better risk:reward ratios, too.
You can download the market structure reversal indicator mentioned here: https://www.mql5.com/en/market/product/46295
The ADR Reversal indicator shown is available here: https://www.mql5.com/en/market/product/62757
Video Transcript
Candlesticks. Okay so let’s talk the main candlestick patterns. So there are loads and loads of candlesticks out there, obviously candlestick patterns out there, but there are only a core that I find or have found over the last sort of decade that are useful. So you can look up, if you go onto Google and type in candlestick patterns, let’s do that now, you will find loads and loads of images showing you tons and tons of different candlestick patterns. You’ve got hanging mans, harami crosses, three black crows, meeting lines, dumpling tops, tower tops, advance blocks, bearish breakaways, all sorts of stuff.
And the problem people have with candlesticks is they tend to look out for too many patterns. And at the core of any price move, there are four patterns or five or four patterns and a few variations of them that you will find, you will always be able to identify at a high or a low. So those are the ones that I concentrate on and those are the ones that I look for. And what I’m gonna do is just basically go through what all of those patterns are and also go through where you should be looking for those ones. So some of them like hammers and stars you shouldn’t be using them everywhere you should only be using them in certain instances. And basically what is making those candlestick patterns happen so what’s going on behind the scenes on them. We’re going to look at some ways that you can draw support and resistance at those patterns to see if there’s any reason why price would have turned there and where to look for them.
So things like yesterday’s highs and lows, weekly highs and lows, session highs and lows, ADRs, M&Ws, all that sort of stuff. So we’ll start off with the actual patterns themselves. So the main ones that I’ll draw them basically really badly probably. Let me just get a blank chart up. The main candlestick patterns that I use and I look for are the bullish and bearish engulfings. So it’s where you’ve got a candlestick that’s pushed up and it can have a wick either side, doesn’t matter.
And this is a bearish engulfing. And then you have another candlestick where the body is longer than the previous candlestick. So this one is going up, this one is coming down and that is a bearish engulfing. So the whole candlestick basically is engulfing the previous one. And obviously a bullish engulfing is where we’ve got a candlestick coming down and then you have a candlestick going up the other way and that is a bullish engulfing.
Yeah so what this is is just a really good strong push in price and then a stronger push in the opposite direction. So the buyers have come in and then the sellers have said no we’re not having any of that we want to go down and so a bullish and a bearish engulfing, obviously this one happens at the bottom of a price move. This one will happen at the top of a price move. The other candlestick patterns we look for are what I call tweezers or tweezer tops, which is where you have a price move up and then you will find a big long wick and the candle can be any length really, doesn’t matter.
So it could be 50% of the candle height, or it could be sort of like a shooting star. But on the next candle, regardless of what size that candle is, the wicks form a double top. Yeah. Or are very, very, very, very close to a double top. This is what I call tweezer tops, and at the other side is tweezer bottoms. So this is a sign of rejection of the highs and then prices try to push up again.
So the buyers have been strong and the sellers have rejected. The buyers have come through again and the sellers have rejected again. And then you tend to get a price move in the opposite direction. And obviously this can happen at the top of a range and then opposite at the bottom of a range. If you went to a lower time frame, would that be a double top? Yes. So we’ll have a look at time frames in a minute and how they work on time frames and what’s going on. So I’m going to look at what’s going on behind the scenes with these in a second.
Then you’ve got hammers and stars. So when we get a move to the downside and we get a small bodied candle with a very long wick on it, that’s a hammer, and they tend to be at the bottom of a move. And at the top of a move, you get the opposite, which is a shooting star, where you’ve got a tiny little body and a tail to the upside, and that tends to be coming down. So it’s the same sort of thing as this, but you tend to find you’ve got a very small body and a very, very long wick. Some people say a hammer has got to have 25% of the entire height of the candle as the body. Other people say 50%.
Doesn’t really matter. What you’re looking for is price to have pushed up really hard and then the sellers come in and say, nah, we’re not having it. And what that does is it leaves a massive wick, basically. And then you’ve got things like three bar reversals. So a three bar reversal, and we’ll have a look at these on the chart in a minute, but three bar reversal will be where price has pushed up and then you get a good strong up candle. And then after that candle, you will either get a doji or you will get a small bodied candle and then you have a big push to the downside, okay? It doesn’t really matter the length of this candle and this candle, but what we’re looking for is a strong push, a sustained push, so there’s very little wick at the top of that candle.
You can have a little bit, but not a massive one. And then we get an indecision candle. So this is kind of like a pause candle, where they try to push up, it’s been rejected, they’ve tried to push down, and we haven’t really gone anywhere. So the bulls and the bears are fighting. And then, the next candle, the bears win. So basically a three bar reversal, as I call it. There’s lots of other things. Some other people call these different things, but some people call them an evening star. So in stocks, this is called an evening star. And what you tend to find is in stocks, obviously you have gaps. So this candle will be a lot higher and it’s kind of an evening star. So it’s sitting up on its own in the sky sort of thing. But a three bar reversal basically, so good push up, some kind of indecision candle and then a solid push down. Okay, on four hour time frame and above these are incredibly powerful, but we’ll look at these in a second. Multiple tail candles, big push up and obviously these will work in the opposite direction as well. And then you’ll have multiple candles, it doesn’t really matter what the size of these bodies are.
They can be anything. So you can have big bodied one and then another sort of smaller bodied one there. But what you’ll find is you’ve got multiple wicks and all of the wicks are pointing in the same direction. So this is a candlestick pattern which is showing signs of rejection of the highs. So whenever you see a consolidation of price with lots of wicks, that is a really, really good indication that price is gonna turn because the buyers are trying as hard as they possibly can to push higher and they’re having some success, but the sellers are winning every single battle.
And eventually you will run out of buyers because people will start to see long wicks and they’ll go, right, this is turning and then it becomes a self-fulfilling prophecy and then it starts to drop. So multiple wicks or multiple tails. And the last candlestick pattern I look for is railroad tracks. And railroad tracks are basically big, strong push up in one direction, and you will have very, very little widths on these. These are mainly just massive bodied candles.
And then you will have completely the opposite in the other direction. And you can have some play, so it can be a little bit different. But the idea with railroad tracks is that these candle bodies are roughly the same size. You won’t see these often, but they’re an incredibly strong reversal candle pattern. So we’ll look at all these now on the chart. So those are the ones, the main ones that I look for. So we’ve got the bullish and the bearish engulfing. We’ve got tweezer tops and tweezer buttons, three bar reversal, shooting stars and hammers, and multiple tails and obviously railroad tracks.
But you won’t find these very often. We’ll have a look for some examples of these, but we may not find them. So those are the main ones. So that is literally all I look for. As I say, I’ve looked at loads and loads and loads of candlestick patterns over the years. I’ve done loads of backtesting with candlestick patterns. And at the end of the day, these are the ones I settled on.
And there is a reason why these are the ones I settled on because when you know what’s going on behind the scenes with these candlestick patterns, it all makes sense that these are the ones that you should be looking for. Okay. So let’s jump over to a chart. I’m just going to get a blank chart up. We’ll go on to H4 for no apparent reason, just picking a timeframe.
So we’ll have a look for these candlestick patterns. And what you want to do is obviously you want to look for them at highs and lows, okay? So we’ve got a perfect example here of a bullish engulfing, which I’ve just lost. Well, there’s one there, we’ll use that one. So that’s a bullish engulfing. So we’ve got a small candle to the downside and then another candle after it straight away, which is a bullish candle, and it’s completely engulfing the previous one.
Now you don’t need to worry about wicks on this. Some people, again, let’s just find another example. There’s one up there. Some people say that a proper bullish or bearish engulfing, the engulfing candle should engulf the entire height of the previous candle. I only work on bodies, so I’m interested in the body because what I’m looking for is for the bearish price action in this case to be stronger than where the bullish price action started. So in one candle, we’ve not only undone the entire move up, but we’ve beaten it and we’ve dropped down below it. A bearish engulfing with a wick on the top, even better. So that’s kind of the sort of the best candlestick pattern as you can see obviously after that it disappeared.
So we’ve got a good example there of railroad tracks. Yeah, big push down and then reversal, very small wicks on these in both heights, both at the top and the bottom, and virtually the same height. It doesn’t have to be exactly the same height, but it’s virtually the same height. And again, these are really good reversal patterns, but you don’t see them as much as often, but you can class these.
The reason people don’t use railroad tracks quite as much I don’t think it’s because this is really a bullish engulfing isn’t it? It’s the same thing this is a bullish engulfing candle. So there’s an example there of railroad tracks. Let’s look for some tweezers. Scroll through see if we can find some tweezers. These are close. So these ones down here, close. I like to see tweezer tops and tweezer bottoms being more level really, but yeah, I think that’s too far away. Let’s just see if we can find a better version. Again, they are much more rare, but incredibly reliable when you spot them.
There we go, some tweezer tops. Okay, so these two candles here, as I say, it doesn’t matter the body. The body’s not irrelevant, but it’s not the most important thing. What’s important is the wicks. So we’ve got a big push up, strong push to the highs, that wick finished there. The next candle, it’s pushed up, almost exactly the same level, put in a double top, and then push back down to the downside, and then we had a big rejection push away from there. Three bar reversal, this is a good example here of a three bar reversal. Good, strong, solid push to the downside. The next candle is either a doji or a small-bodied candle with high, with long wicks either side, so this is indecision in the market, followed by a big bullish candle, and obviously big strong move to the upside.
Now the three bar reversal here, big strong push up, rejection candle, small body, wicks to the up, wick to the down, and then a move to the downside. This I would normally like to see a little bit stronger. I usually like the bearish part of a three bar reversal to be roughly 50% or more, ideally, not always the case. There you go, there’s a good example there. Three bar reversal, yeah, doji, small body doji, down move, small body doji, bullish. Yeah, three bar reversal, there, another one, good example. This is one of my favorite candlestick patterns. Obviously, not all candlestick patterns work every time, but there’s some tweezer bottoms there, and again, not quite right distance. They need to be quite close together, those.
Hammers and stars. Obviously, hammers and stars are fairly straightforward. There’s one there. So again, lots of people have different views on hammers and stars. This is a hammer, so we’ve got a long wick to the downside, small body, small head. What you don’t want to see is a big wick. If it’s a big wick, it’s more of a doji. Yeah, so big wicks to the downside. So that’s a hammer and a shooting star is obviously the opposite on the upside. Let’s try and find a shooting star. I’m not going to find one now. There you go, there’s one there. Shooting star. Yeah, so big body, sorry, small body, big long wick. And very, very tiny. You tend to find there’s usually a very, very tiny wick to the downside on them, yeah. So those are the main candlestick patterns. Oh, and multiple tails. So let’s just find an example of multiple tails. There we go, for example.
Yeah, so we’ve got multiple candles, normally three or more candles, yeah, in a block, in a consolidation, yeah, where you’ve got big long wicks to the downside, yeah, tails, multiple tails, yeah. And this can happen obviously to the upside as well, multiple tails to the upside. So this is just literally a sign of rejection. So the buyers, the sellers have been coming in, they’ve been pushing down really hard, pushing down really hard.
They push down harder, balls have come in. Next candle, they’ve tried again, they’ve pushed down, balls have come in. The balls have come in again, they’ve tried to push down, balls have come in. Bears have tried again, didn’t stand it. And then eventually the balls will win out and price will just shoot off to the upside. So whenever you see lots and lots of tails to the downside, normally afterwards you’re going to get some kind of move and the move is either going to be a pullback, doesn’t have to be a reversal, or a reversal.
So you’re either going to get a really decent move or you’re just going to get a pullback and a continuation. But what this is showing is there’s basically an exhaustion. So the sellers have literally run out of orders. There is just no more sellers in the market. The buyers are all sitting there wanting to take profits and basically boom, up it goes. Obviously you get tweezers hop, which is also a bearish engulfing. Yeah, yeah.
As you may consider that to be even more powerful. Yeah, I mean, basically the reason I picked these candlesticks is because there are so many out there, but when you look at all the other candlestick patterns they all have the same characteristics of these core sort of five of patterns that are there. So, a three bar reversal will quite often have a hammer in the middle. Yeah, so it doesn’t have to be a doji just have to be a small body candle with a big wick on it. So that is a three-bar reversal, a downward move, a rejection of some kind or a pause candle and then a push up. Yeah that’s a three-bar reversal. So if you’re going to take this, you’d wait for this candle to form, you can either jump in straight away or you can put a pending order above the high, stop at the low, off you go. Yeah, three-bar reversal. That is not really a three by reversal but here we’ve got obviously wick to the upside that is kind of a shooting star. I’d like it to be a little bit bigger ideally but at the end of the day it’s got a massive wick to the upside and it is a bearish candle so you could class that as a shooting star. So yeah, so there’s good examples of the patterns. So go back and back test this, three bar reversal, push up, rejection, pause, sell. Bullish engulfing, yeah, three bar reversal, push down, small bodied candle or pause candle. Ideally it’s normally a doji, so the body would be in the middle, but it’s a rejection.
And then a big, bullish push. Stop at the low, enter there, or a pending order above. Off you go. Yep. So, three-bar reversal. This is my very, very favorite pattern. So if I see a big push, a rejection, either a shooting star at the top or a hammer at the bottom, or a doji, followed by a big, strong downward move, they are incredibly reliable patterns, especially on higher time frames like the four hour or the daily when you see these. And ideally what you want when you’re seeing any of these candlestick patterns is because these are all reversal candlestick patterns, not continuation candlestick patterns, we want to see them at the tops or the bottom of moves and obviously what we don’t know is whether we are at the top or the bottom of a move because all we’ve got is what’s to the left of us. We’ve got no idea when we see these candlestick patterns whether or not they’re going to play out. So one way to find out whether a candlestick pattern is likely to be a good one to take or not is to look left whenever you see one. So when we see a three bar reversal or a wick or a bearish engulfing, so let’s take this one up here for example, or this one here, it doesn’t matter which one. So when we see one, what you can do is draw a line at the top of the candlestick pattern. So we’ve got push up and then we’ve got a push up and a rejection and break to the downside so that’s a bearish engulfing. So do we know if this is a good one to take or not? So we are here at the minute aren’t we? That’s all we can see right now is that. So the only thing we’ve got to go on is well what’s happened to the left? Now a lot of these candlestick patterns what you will find is they are stop hunts a lot of the time. So what we are looking for when we see a candlestick pattern like this forming is some kind of level to the left where they will have taken people’s stops out. So price moves up and basically they will give you some kind of signal to go short. Everybody enters short and they put their stops here.
Yeah. And then they push up again, give you another reversal signal. Everybody gets short, they put their stops up here. And then they push up again, they give you another reversal signal. Everybody gets short and they put their stops up here. But all of these worked, didn’t they? To a certain extent. But what you will find is when you see these, the best time to take them is when they have just taken out some liquidity. So here at these highs, we’ve got an area of resistance, which has been resisted twice. If you remember the class we did on support and resistance the other day, which I put up on YouTube, the best type of support and resistance has been tested at least twice. So in this case, we’ve got support and resistance being pierced and a bearish rejection, bearish engulfing, and then obviously price drops away from there.
So whenever you see a pattern, look for a reason for it to have turned there. So just don’t take every single one you see, draw a line at the top and say, right, to the left of me, is there any reason why price will be turning at this point? In this case, yeah, because there’s a load of stops up here at these two highs where they’ve just raided them. Yeah, and we’ve also got another one going on there that got a shooting star going on there.
I’ll cover this one in a minute and why you wouldn’t have taken this one. But there’s basically loads of liquidity there and that’s basically what it’s done. They’ve just put a bearish engulfing so they’ve moved up they’ve pushed up high they’ve taken all the liquidity from the stocks above these highs here and then they’ve just run away with it. So look for a reason to take a trade so when you see a pattern you need to have a reason to the left to validate if you like why that pattern is there. Looking at shooting stars and hammers, I’ve just spotted some nice tweezers there, there’s a good example of tweezers. Yeah, tweezer buttons, off we go.
Shooting stars and hammers, these guys need to happen at the top or the bottom of a strong move, okay? So you’re going to see these absolutely everywhere. There’s indicators out there that will draw or alert you to shooting stars and hammers. And you will find they happen constantly, yeah? So there’s one there, there’s one there. It’s a doji, that’s kind of a dead stone doji. You’ll spot them all over the place. You can class that one as one, you could probably class that one as one.
So you’ll see them everywhere, but these are just basically rejection candles in an up move. A proper shooting star or proper hammer will happen at the top of a move, at the very top of a move. So when price has got down to a new level where there’s not really anything to the left, so this one here for example, we’ve pushed down really hard, there’s not really anything to the left, and this is a sign of exhaustion. And look where this wick is. Yeah. So if we’d have seen this candlestick, what would we have done?
Drawn a line at the bottom of it. Is there any reason why that should be turning there? Yes. Previous area of support and resistance. Held multiple times, tapped straight into it. It’s taken out the liquidity of anybody that had their stocks under there, and then we’re moving away. Yeah, but this one here, for example, if we draw a line on that one, this hammer, is there any reason why that should be turning there?
Not really, is there? It’s just in the middle of a consolidation zone, yeah. But if it happens at the bottom of a move after a strong down move like this one, let’s draw a line on that one. Any reason why that one should have turned and been successful? Of course there is, it’s a double bottom. Yeah, so whenever you see a candlestick pattern, the best ones are going to be ones that are reacting at support and resistance. So this is price action. We’re looking at price action candlestick patterns here. And what we’re looking for is price action to be happening at support and resistance. Yeah, because they’re gonna be much more successful and work an awful lot better.
There’s one here. If we look to the left, any reason why that one should work? Not particularly clean, is it? It did work, but it’s a previous area here where price is rejected. So not particularly clean that one, but that’s a good example of one that you probably wouldn’t have taken that has worked out. So, but yeah, so basically whenever you’re looking at price action candlesticks, always look for a rejection point that you are potentially at.
So it’s either gonna be a level or a zone, and we covered support and resistance levels and zones so this one now here I would class as a really good resistance zone and next time price pushes up into that area we’ll probably be looking for some kind of rejection. So we’re looking for a candlestick pattern so when we push up to this area again we’ll be looking for either a bearish engulfing, a shooting star or a three bar reversal happening at that level. Yeah bearish engulfing at that zone. Could have taken that one, probably wouldn’t have worked out that one you would have got stopped out. But yeah, so that’s basically how you find them. Another way you can use these as well is obviously with previous highs and lows.
So whenever we are, let’s get down to a lower timeframe. Whenever we’re looking at price action candlestick patterns on lower timeframes that we spot, what we want to be doing is seeing if there is an area that is recently being, that is being swept basically, an area where there’s likely to be some stops of previous moves, okay? So here, for example, we’ve got a low in London put in, Asian and London low is the same. Then the next day in New York, we came down and we hit that area again, putting in a sort of treble bottom.
And then the next day we had a push down whipped through that level and a bullish engulfing. So that bullish engulfing there would have been a really good example of one to take because we’d just taken out previous liquidity. That one didn’t work, it failed. But that’s what we’re looking for. We’re looking for a reason for price to have rejected. So here, this bullish engulfing here is a rejection or a bounce, a double bottom bounce off of the previous day’s low.
Yeah, so that would have been a good one to take. That would have worked out really, really well. Up here, we’ve got an Asian session high and price moved up to it again and it started to put in shooting stars. Let me just zoom in. So here we put in a shooting star. There, at that level, sorry, not that one. This one here. Yeah, so putting a shifting star.
So you can see WIC pushed up, rejected, WIC pushed up, rejected. That would have been where you would have put your pending sell order under one of those two there, and then price obviously collapsed. If you’d have put a tight stop on this one, you would have got taken out, but it depends where you put your stops. I always recommend putting stops five or 10 pips above wherever you’re getting in to give yourself some breathing room because we know price pushes up again.
So yeah, so those sorts of ranges, candlestick and RSI, yeah. Yeah, so you can use candlestick patterns basically, are these are your entry signals. So, you know, this is the reversal alert indicator. And if I get a reversal alert after seeing a solid candlestick pattern, I’m all over it. If I get a reversal alert and there isn’t a good quality candlestick pattern behind it, it’s a lot less reliable.
You’ve got confluence here with the relative strength index indicator. So a good rejection or reversal candlestick pattern when the RSI is extended and a reversal alert collapse. Yeah. So candlestick patterns are key. And it’s, you know, a lot of people trade naked charts. I traded naked charts for quite a long time. In fact, I traded naked charts purely with moving averages like this. And it’s incredibly powerful. But I ended up whittling my candlestick patterns down to those core ones because they all have a meaning. And the meaning of them all is another party taking control of the market. So when you see price push down and leave a long wick, it means that the sellers were beaten back by the buyers.
When you get a pause candle, like a doji, a dead stone doji or normal doji, it means that there was indecision in the market. The buyers and sellers couldn’t agree. And then when you get another candle after that, where the buyers or the sellers have tried to come in, push price down and have lost, and the buyers have won, that is when price will start to tend to move off to the upside. Big, strong push down, sellers in charge, buyers come in and say, that’s enough, we’re taking over, push to the upside, push to the upside. That’s not a bearish engulfing, but you get the idea. So those candlestick patterns all have a meaning behind them. What’s going on behind them creating those candlestick patterns is one side of the market losing to the other side.
And it’s the first indication we get that there is weakness in the market. And this is, again, the reason I love the RSI is because it’s showing you a strong move, big, strong candlestick moves. When we get down to these levels and then we see those sellers starting to weaken and the buyers coming in, bullish engulfing in that case, that’s a really good sign that we’ve potentially got a reason to go long. It’s not the only reason to go long, obviously. You’re gonna need to look to your left and see if there’s a level and a reason why you should be getting into a trade at that level, wherever that level was. So yeah, so that’s basically you know the key candlestick patterns that I look for. Other good reasons, good times to look for candlestick patterns is highs, ADR highs in particular.
So let me just find my ADR indicator. So ADR highs. So when we get a push up to an ADR high, so whether it be 100% or 150 or wherever it’s gonna get to. So if price pushes up and gets to 125 ADR, puts in a shooting star, which takes out a previous high. Perfect time to get in. Yeah. So when we get extended, price is extended really far beyond its normal average daily range.
That’s another great example of when you should look for candlestick patterns. Obviously we use the reversal alert indicator as well on M5, so we’re looking for reversal alerts at those levels. But if you wanna get in quicker before the reversal alert is forming, bullish engulfing. Yeah, could have taken that bullish engulfing. There was no other reason, if you look coming down here, there was no other reason to get in apart from that bullish engulfing there.
So, and the other thing you’ll find about these patterns as well is that they will also form usually the first part or the first leg of an M or W pattern. So this is a good example actually right here. We’ve got a nice W form in here, so we’ve got a low formed, then it pushes back down again. This is the second leg of this W and then it pushes back up again. So the first indication we had that this could be a reversal was this bullish engulfing. Then price pushes back down again, gives us another bullish engulfing. And this bullish engulfing is higher than the previous bullish engulfing, which means we are potentially creating a W.
So if you were to take this bullish engulfing here, this is the best possible entry on a candlestick, on a reversal candlestick pattern that you could get. So you’d be getting in here on that move. The reversal alert indicator will have given you a confirmation when these highs were broken, that you were right, but you could get in on the candlestick pattern. Obviously the problem is that that candlestick pattern can fail.
So, yeah, so that’s candlestick patterns. That’s really all I wanted to talk about with those and just cover the main ones that I use. So go out and have a look for those, watch the video again if you want to. I’m gonna put this up on YouTube so you can watch it again. But go and look for those candlestick patterns over and over again and spot them. And you will spot them all over the place but look when you get reversals you will always usually find one of those candlestick patterns at those reversal points so make sure you can see a support or resistance area when you get the patterns and then you can take those trades if you want to use a stop loss obviously stop above the high and then give yourself a really good risk reward. 80% of the time the market is range bound so the likelihood is when we get one of those patterns at the support and resistance level, we’re going to look for some kind of reversal to come in.